Wondering What To Do With Kids Artwork? Create a Forever Photo Book
Looking for a way to commemorate your kids’ artwork, or your own, without hanging on to huge piles of paper? You can make a photo book of art in no time with a Rocketbook Color, Google Drive and Google Photos!
This post originally appeared as a paid post on the Rocketbook Blog. The Rocketbook Everlast is a reusable smart notebook. You can upload your handwritten notes to Evernote, Google Drive, OneNote and other cloud applications using the Rocketbook app. When you’ve filled up the notebook, just use water to erase your notes. I’ve shared how I use my Rocketbook to keep life running smoothly. This is my guide to making your art into a lasting photo book!
Get the Essentials
You’ll need a Rocketbook Color and a variety of colorful markers to make your masterpieces! You will also need to have one of your Rocketbook symbols set up to send pages to Google Drive (any folder is fine). Now let the creative juices flow!
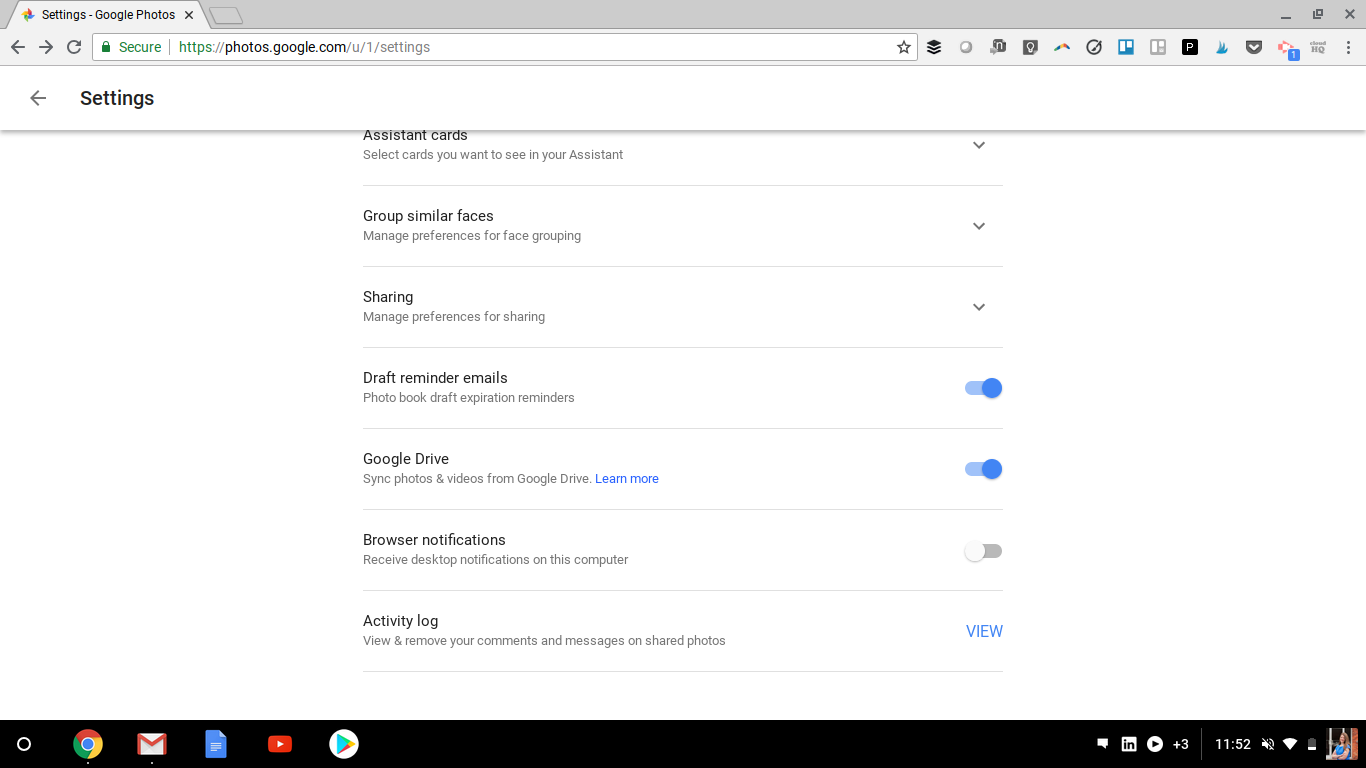
Step 1: Enable Google Photos to access pictures in Google Drive
First, navigate to Google Photos and make sure you’re signed in. Click on the Menu icon in the upper lefthand corner (three horizontal lines). Select Settings (gear icon). Scroll toward the bottom and turn on “Google Drive: Sync Photos and Videos from Google Drive.”
Step 2: Make Awesome Art
Let your imagination run wild on the pages of your Rocketbook. And, if you make a mistake, just erase with water!
Step 3: Upload to Google Drive
When your artistic creations are complete inside your Rocketbook Color, the next step is sending them to Google Drive from the Rocketbook App. It doesn’t matter which folder you send them to – all folders in Google Drive will sync to Google Photos once you’ve turned the sync option on. Be sure to standardize the filenames so you can search for the photos once they’ve been synced to Google Photos. You should also set File Type to JPEG when you set up your Kids’ Art destination in the Rocketbook app. This will ensure that the files will sync with Google Photos.
Step 4: Find Art in Google Photos
When you’re ready to create your book of art, head on over to Google Photos. In the search field, enter the standardized filename that you chose in Step 3. For example, if you stuck with the default file naming, you can search for “RB”. If you chose something else, search for that, e.g. “Kid Art”.
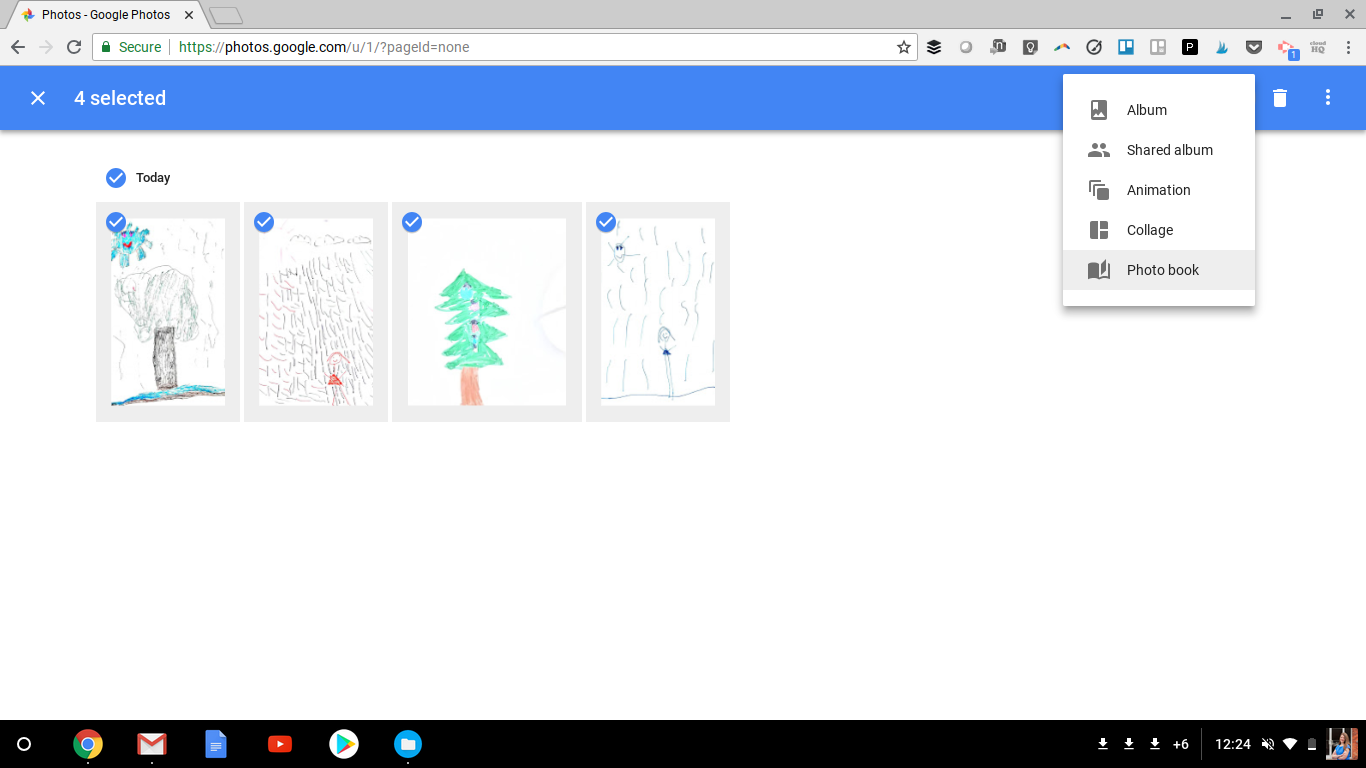
Step 5: Select Photos
Select the pictures you’d like to include in your book by clicking on the picture in the Google Photos window. Selected photos will have a checkmark in the upper left hand corner. When you’re finished selecting pictures, click the plus sign (+) in the upper right hand corner of the screen and then click “Photo Book”. In addition to including the drawings from Rocketbook, you can also take pictures of physical art to include in the photo book.
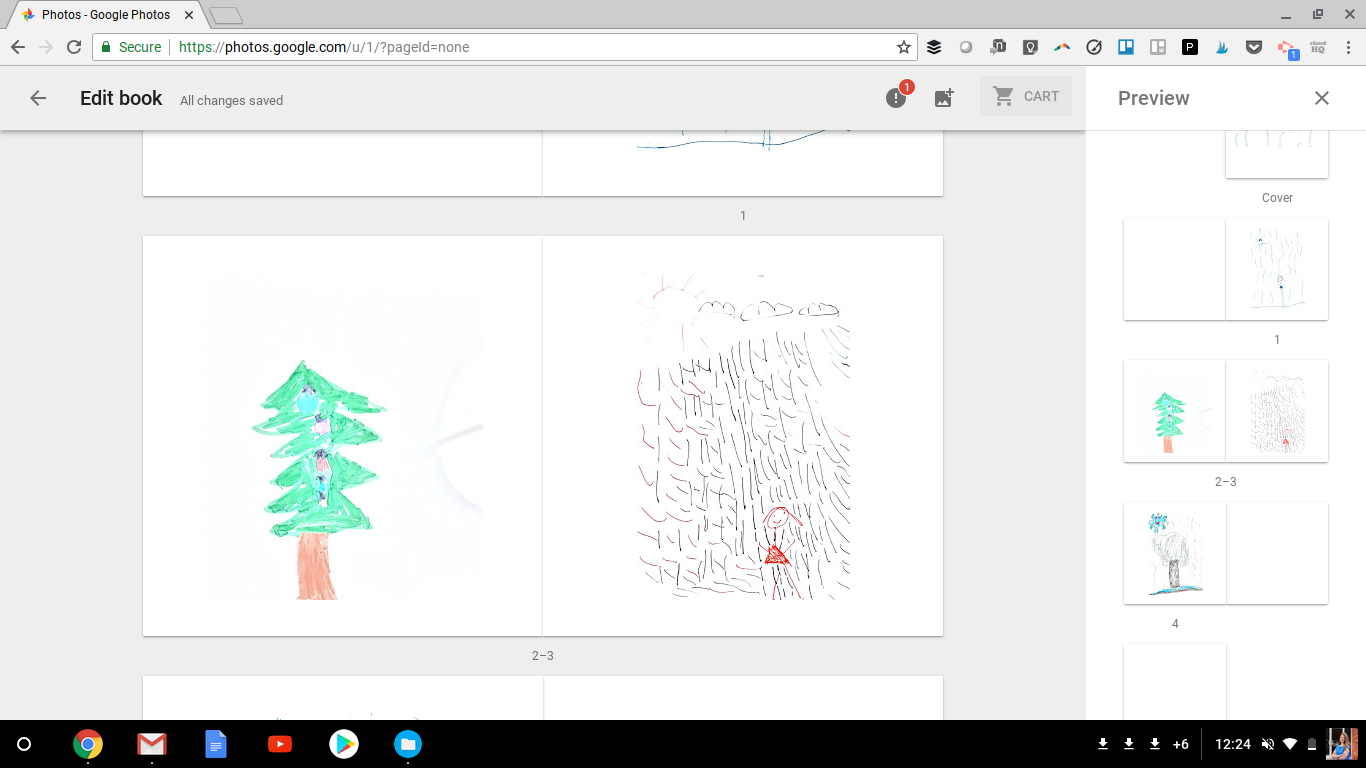
Step 6: Customize your Photo Book
You can include between 20 and 100 photos in your book! Any picture in Google Photos an be included, so go ahead and intersperse family photos with uploaded artwork. Customize your cover photo and title by clicking on the cover in the photo book display. In the photo book display window, you can also drag and drop pictures to rearrange the order.
Google Photo Books currently doesn’t offer options like custom layouts or captions. There will be just one picture per page, with three different size options. You can’t get too creative because of the limited layout options, but the upside is that the Google Photo Book can be created in a matter of minutes!
Step 7: Check Out
When you’re happy with your book, click on the shopping cart icon in the upper right hand corner of the screen. You’ll be able to choose between a 7” square softcover book or a 9” square hardcover book.